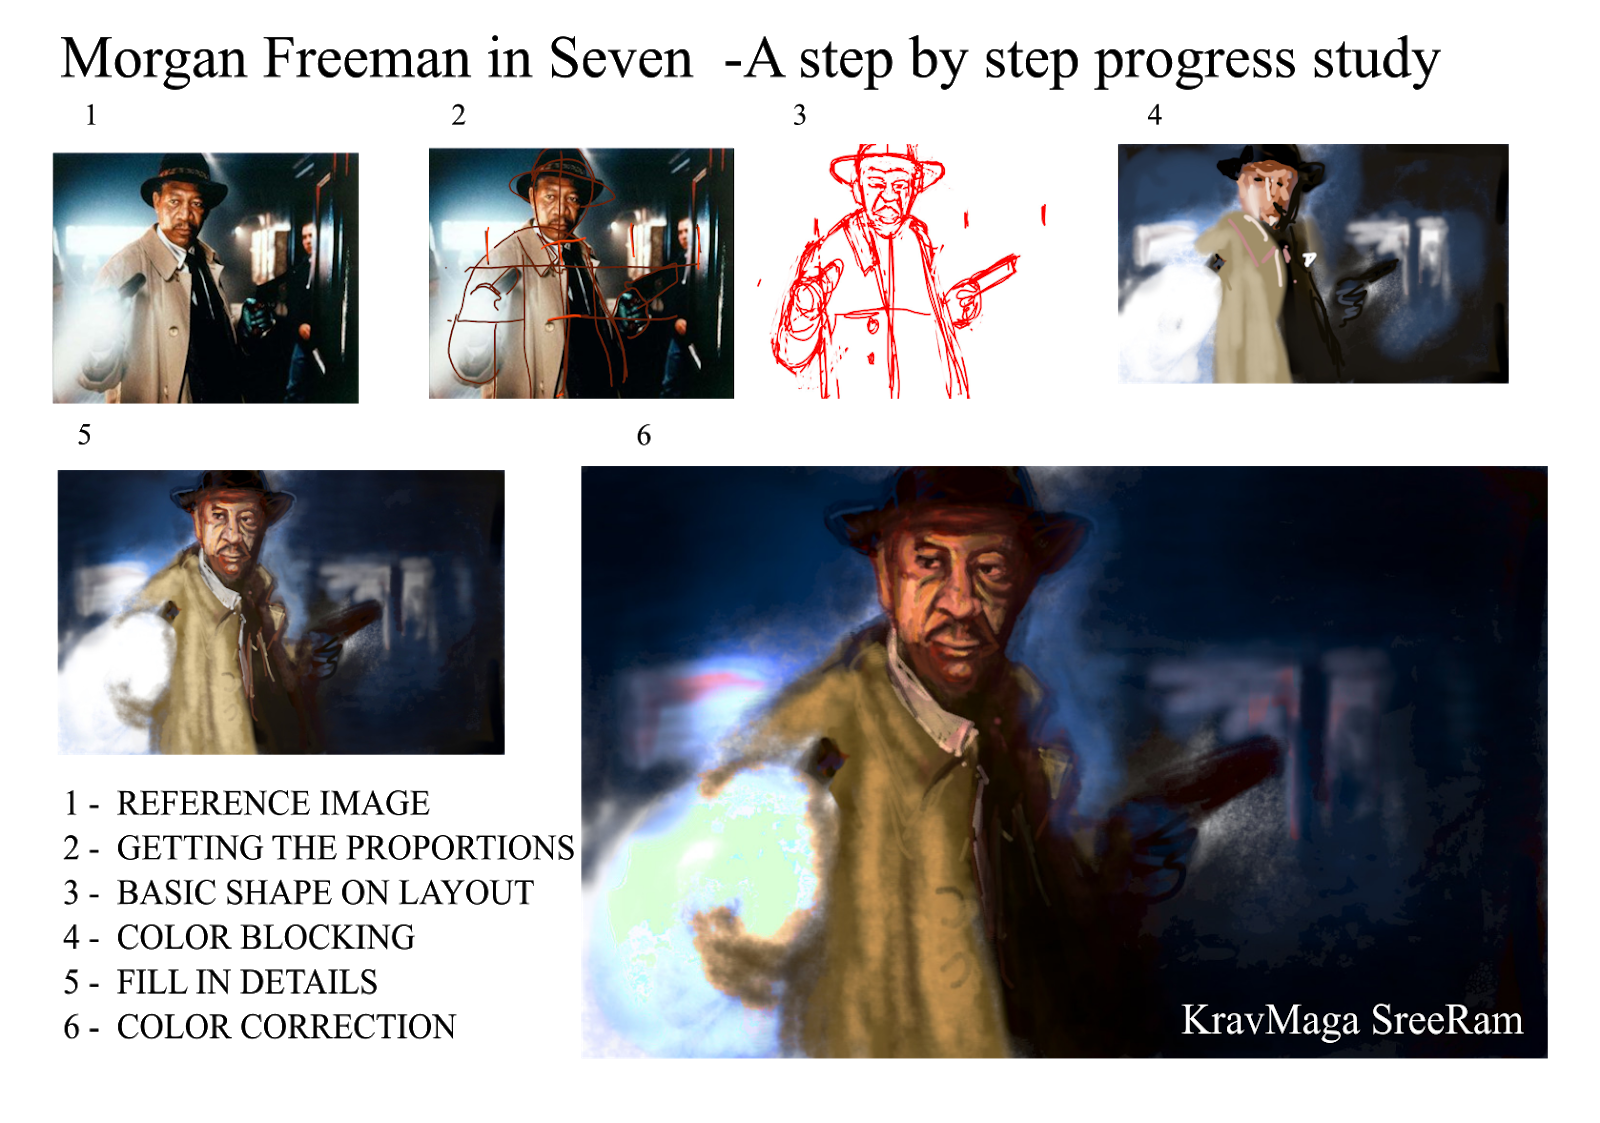
1.. is the reference image.
2. GETTING THE PROPORTIONS
When we work on computers, the easy way out is to trace the image, But there is NO learning in that. To teach myself to observe the proportions, I took Morgan's face length as the base measurement scale. So his shape in this photo was roughly 3 faces height and approx 2 faces width.

3. BASIC SHAPE ON LAYOUT
Now that I had the measurement references, i fixed the centre line of Morgan, approximatly cutting him vertically down from the centre of his eyebrows and along his jacket's edge /lapel.
Once these parameters are defined, it is reasonably easy to draw Morgan's outline on the overall layout.

4. COLOR BLOCKING
In another layer, I started fixing the color hue (color) and values (light to dark). At this stage I am not getting into the details, as my intention is to get the image's unique character in place. I know if i get this stage right, it is only a small step forward to ...

5. FILL IN THE DETAILS
This is more or less the last mile of completion. One can leave with this version or add some drama with....
6. COLOR CORRECTION
add some personal flavour in the color, make the tones richer, remove some unwanted details.
This is more or less the thinking and execution process when working on an opaque medium like oil, acrylic or crayons..
While using water colors we have to be more deliberate while blocking the colours, since no camouflage is possible
..........................................
SreeRam
0 9380000555
No comments:
Post a Comment